The Wayfinding Editor allows you to build an efficient interactive floor plan for your events using the Interactive Floorplans features. Once the Interactive Floorplan and points of interest have been created, these can then be mapped onto the floorplan using Nodes and linked together using connecting Paths.
There are four (4) key features of the Wayfinding Editor:
TIP:
It is recommended to map point of interest Nodes first, so you can easily see where all major exhibitors, booths or rooms are located. Then you can begin adding mapping Nodes at all major intersections of your floorplan (e.g. walkways with multiple directions to go), and finally connecting Paths between these points.
Nodes
A Node defines a point on the Map, which could be a Booth, Room or an Exhibitor. It can also be a pathing node to connect two or more paths.
Several steps are involved with configuring Nodes:
Defining the Nodes
There are various types of nodes. These include Exhibitor, Booth with multiple exhibitors, venue Room, or Waypoint. Consider which of these points of interest you will use for your interactive floorplan.
Node Types
Type of the Node is used to define the node and its relative action. Node type can be selected from the drop-down list:
- None: This makes it a simple pathing node facilitating in connecting two or more paths
- Exhibitor: The node is setup as an exhibitor and can be linked to a specific exhibitor
- Booth: The node is setup as a booth with a Booth Number. This is best used when there are multiple exhibitors in the same booth
- Room: The node is setup as a Room and can be linked to the rooms created under floorplans. This is best used to mark rooms for workshop or sessions.
Map Nodes
To add a Node on the Map:
- Right-click on the map where you want to place the node. A green dot is placed on the map where the Node is created
- Click on a vacant place on the map or use the escape key to deselect the node before creating another node
- If the node is not deselected, right-clicking to create another node would automatically create a path between these two nodes
- It is recommended to create all the Nodes before joining the paths.
TIP:
Select a Node to check if it highlights all the paths connected to it. If it does not highlight a path connected to it, then that path would not be included in Navigation and needs to re-mapped

If a node is placed on an existing path between two nodes, it is not inserted between the two nodes. The existing path would still skip the new node
Define a Node
To define a node:
- Right-click on the map where you want to place the node. A green dot is placed on the map where the node is created
- Navigate to Node Details on the right-hand options
- Input node Name. Name can be left as default, however, renaming the node can be helpful when connecting a path between two layers
- Assign a node Priority. A priority can be assigned to a node to make it more accessible than other nodes. High Priority can be set for a Node to make it more accessible than others. A None defines a Node as No Pass Through, typically assigned to Booths and Rooms.
- Select the appropriate node Type from the drop-down
- Reference field will update based on the Type selected. Select a relevant point of interest
- If Type is Exhibitor, Reference field lists a drop down of all the Exhibitors created
- If Type is Room, Reference field lists a drop down of all the Rooms defined
- If Type is Booth, Reference field needs to be populated with relevant booth number (This booth number should be the same in the relevant Exhibitor Page)
- If Type is None,reference field is not displayed for editing, as pathing nodes do not need to be defined with a reference.
TIP:
Pathing Nodes do not require additional Node details. They can be plotted as required for easy navigation.
Delete a Node
To delete a Node
- Select the node to be deleted. When selected, the node is highlighted with an orange ring
- Hit the delete button on the keyboard
- Make sure you have the correct node selected for deletion
- This would also delete all the paths connected to that node
Paths
A Path is a connection between two or more nodes. A path needs to exist between nodes for navigation to and from that node. These paths are bidirectional by default.
Several steps are involved with configuring Paths:
Create a Path
Paths must be created to link the nodes together. If nodes are not connected by a path, they cannot be reached using the Interactive Floorplan.
To Create a path:
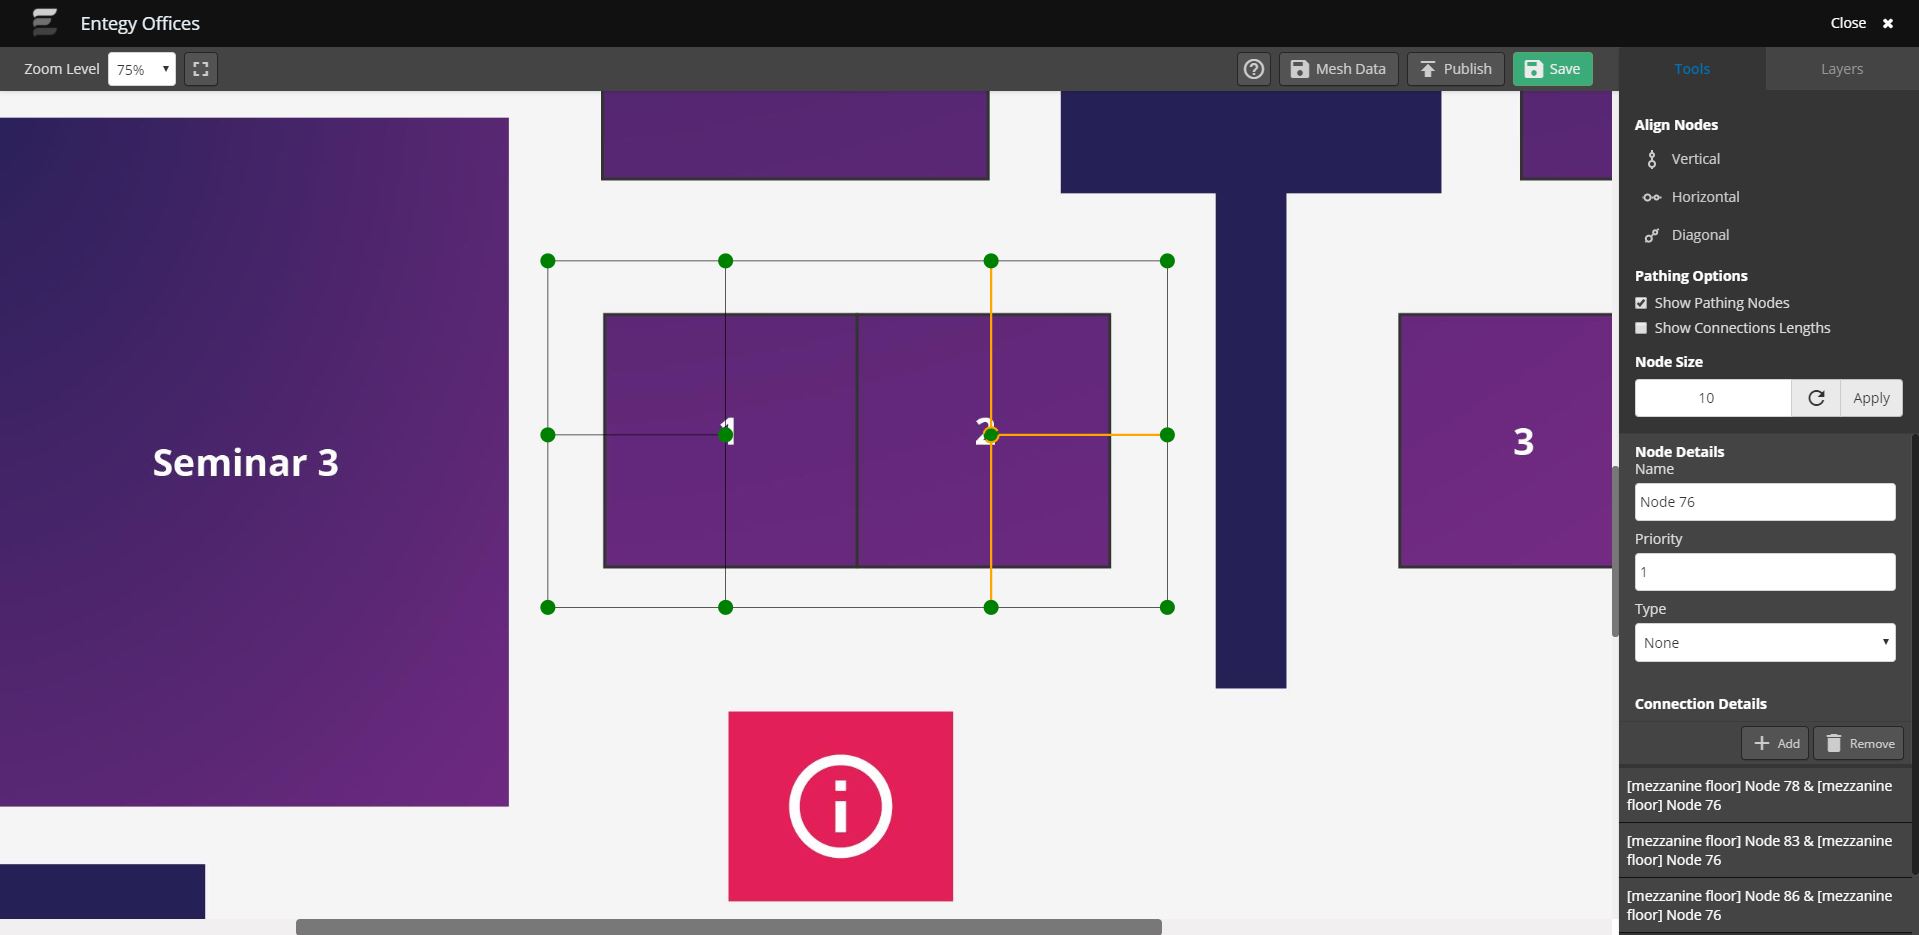
- Click on the node you want to establish a path from. When selected, the node is highlighted with an orange ring
- Right-click on the destination node to be connected
- An orange path is displayed to indicate the connection between these two nodes
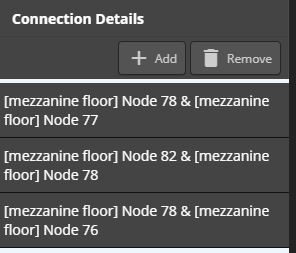
- The connection Details on the right side list all the Paths connected to that Node
TIP:
- While mapping the path it is recommended to make note of the physical obstruction and map around it
- The fastest route is calculated based on the mapped path
Delete a Path
To delete a Path
- Select a path by clicking on the node linked to that path. When selected, all the paths linked to that node are highlighted
- To identify the right path to delete
- Hover mouse over the source and destination nodes to find the node names
- Navigate to Node Details from the right-hand options
- Select the path connecting these two nodes under Connection Details
- Click Remove
- Click Save
Align Nodes and Paths
Wayfinding needs to be well structured in order to present the attendee with a simple path to arrive at their target location. To achieve this, the paths are better presented if the nodes are aligned. The nodes can be aligned vertically, horizontally or diagonally based on the layout of the map.
To Align the Nodes:
- Select the nodes to be aligned
- Click and drag the mouse over the nodes to select them OR
- Hold down the shift key and click on the nodes to select them.
- Note: First Node selected will be the point of reference for alignment
- Once the desired nodes are highlighted, click on the required Align Nodes feature in the right-hand options (Vertical, Horizontal, Diagonal)
- Click Save
Create a path between two levels
If your venue or event is across multiple levels, it is important to map between the levels. This is done by placing nodes on each level at either a staircase, elevator or other methods of moving between floors. Then these nodes are connected by a path.
To create a path between two levels
- Navigate to Layers from the right-hand options
- Select the first floor you wish to connect
- Create a Node on that level at the location where a physical path exists to the other level (e.g Stairs, Lift, Exit)
- Rename the Node for easy identification (Optional)
- Repeat Steps 1 - 3 for the other Level
- Click on one of the newly created nodes from any of the two levels
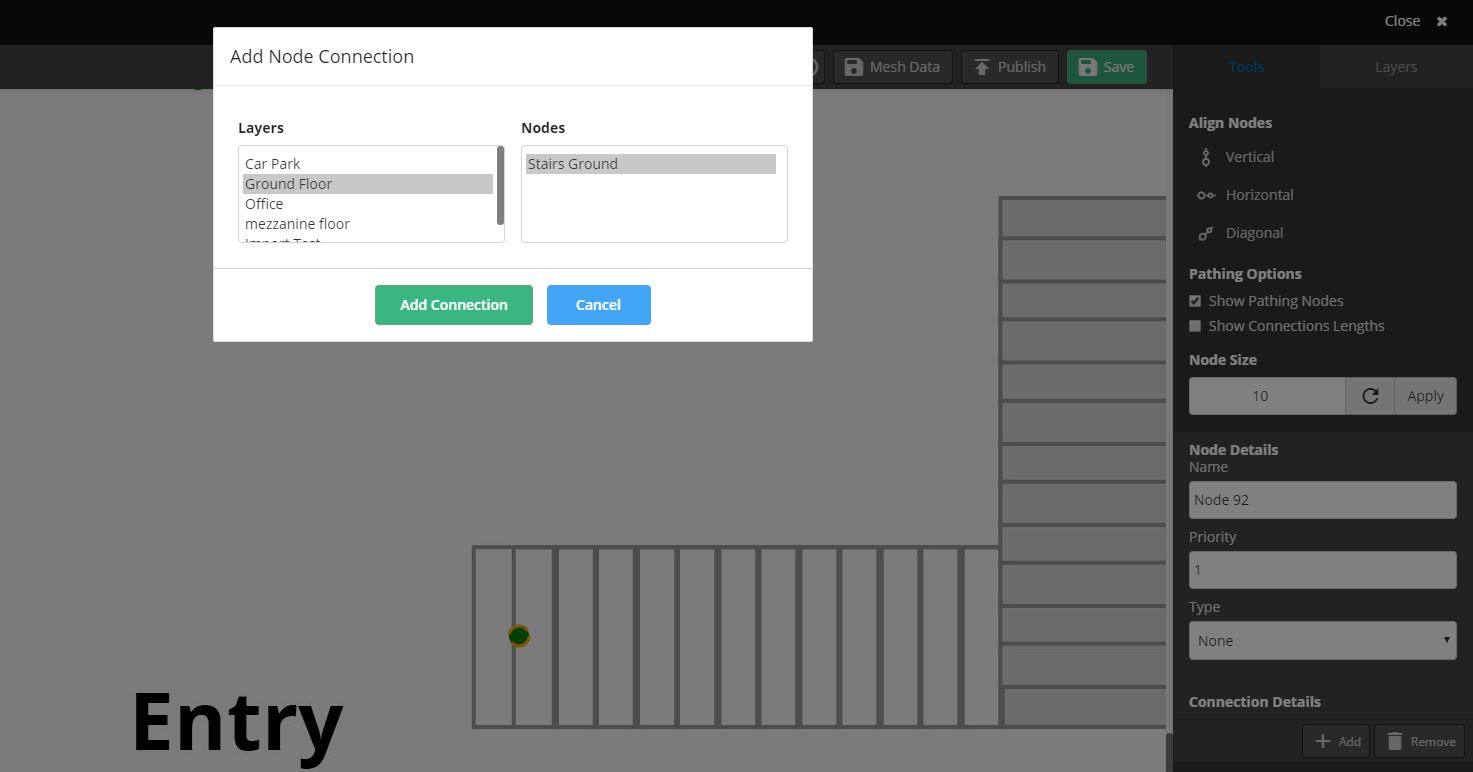
- Select + Add button from the right-hand options
- This will open a Add Node Connection dialogue box
- Select the destination Layer to connect to under Layers
- Select the corresponding node to connect to under Nodes
- Click Add Connection
- The node will turn blue to confirm the connection has been created
- Click Save
TIP:
Renaming the Connecting Nodes is advised for easy identification of the nodes from the list of nodes