How to configure Kiosk display screens
The following article will guide you through the steps required to configure your Kiosk user and admin display screens.
This article covers:
- Starting the Kiosk application
- Where to find project and kiosk access codes
- User display and function of each button
- Admin display: how to access, change a project, check settings and updates
Entegy Kiosk
- Open the Entegy Kiosk application from the desktop icon
- Entegy Kiosk menu (see below screenshot)
- Launch button: starts a new instance of the kiosk, if there is a project already logged into the kiosk you will be prompted to start that project or start a new kiosk.
- Update button: if there is an update ready for the kiosk this button will prompt you to that it is ready to install. Update prompts will be either a standard ‘Update ready’, or ‘Update is required’, it is advised that required updates be installed before using the kiosk.
- Uninstall button: accepting the prompt will remove all the Entegy kiosk applications from the computer. Note a PC restart is required to remove all components.
- Check logs button: currently unavailable

update ready

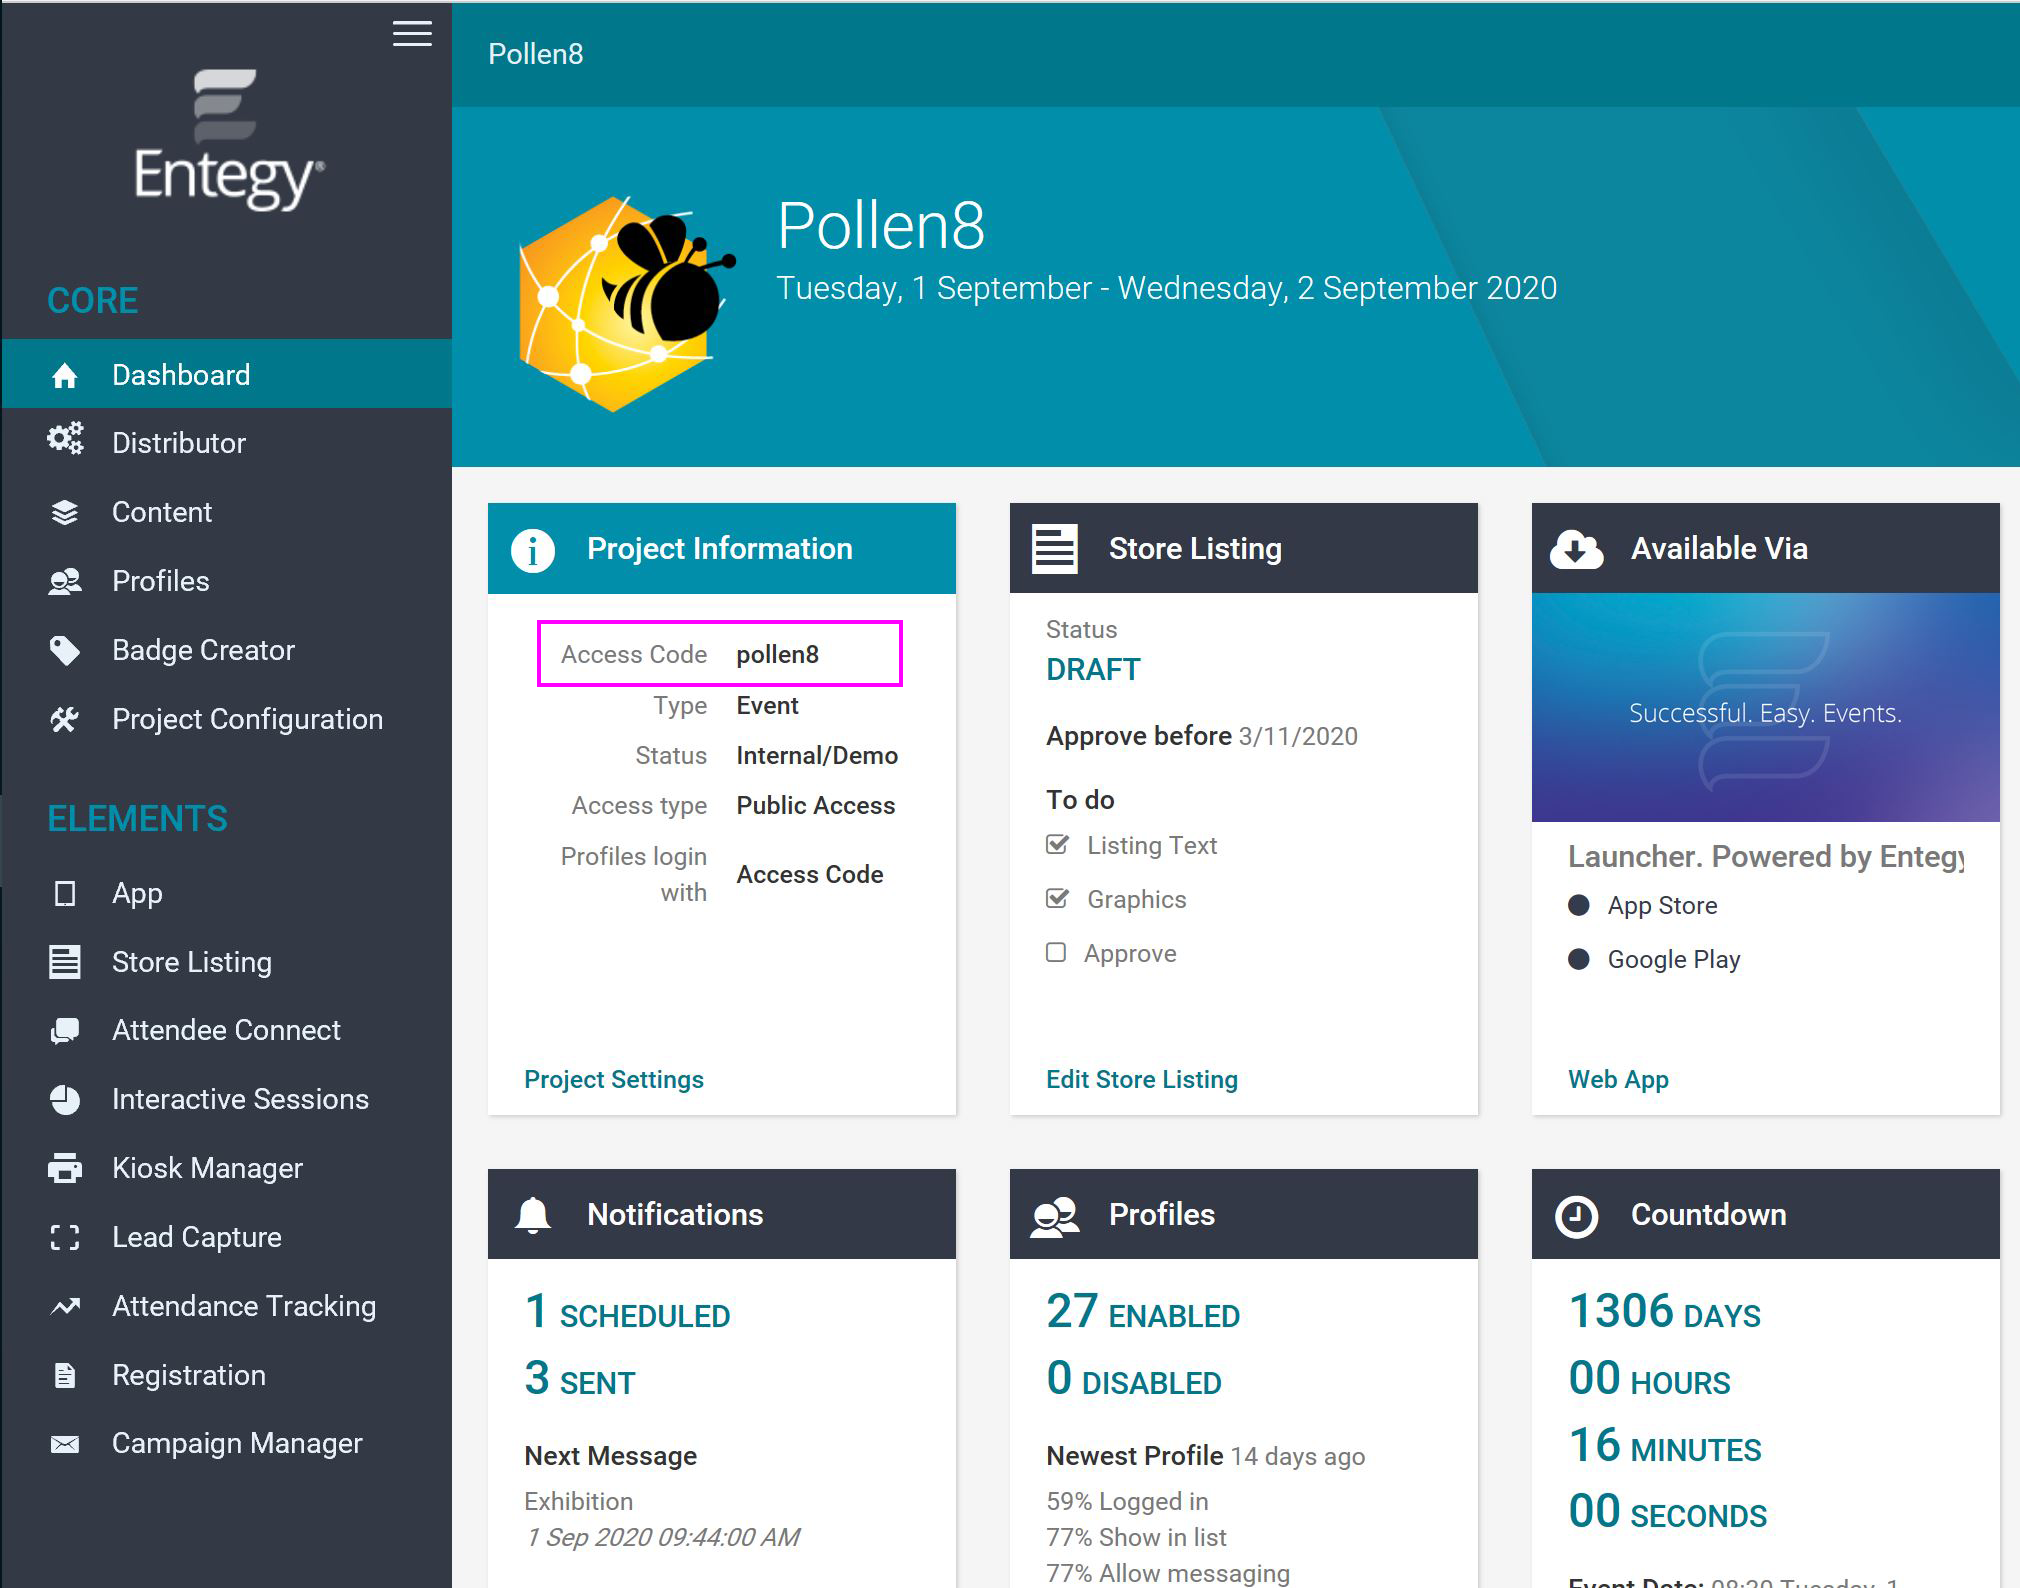
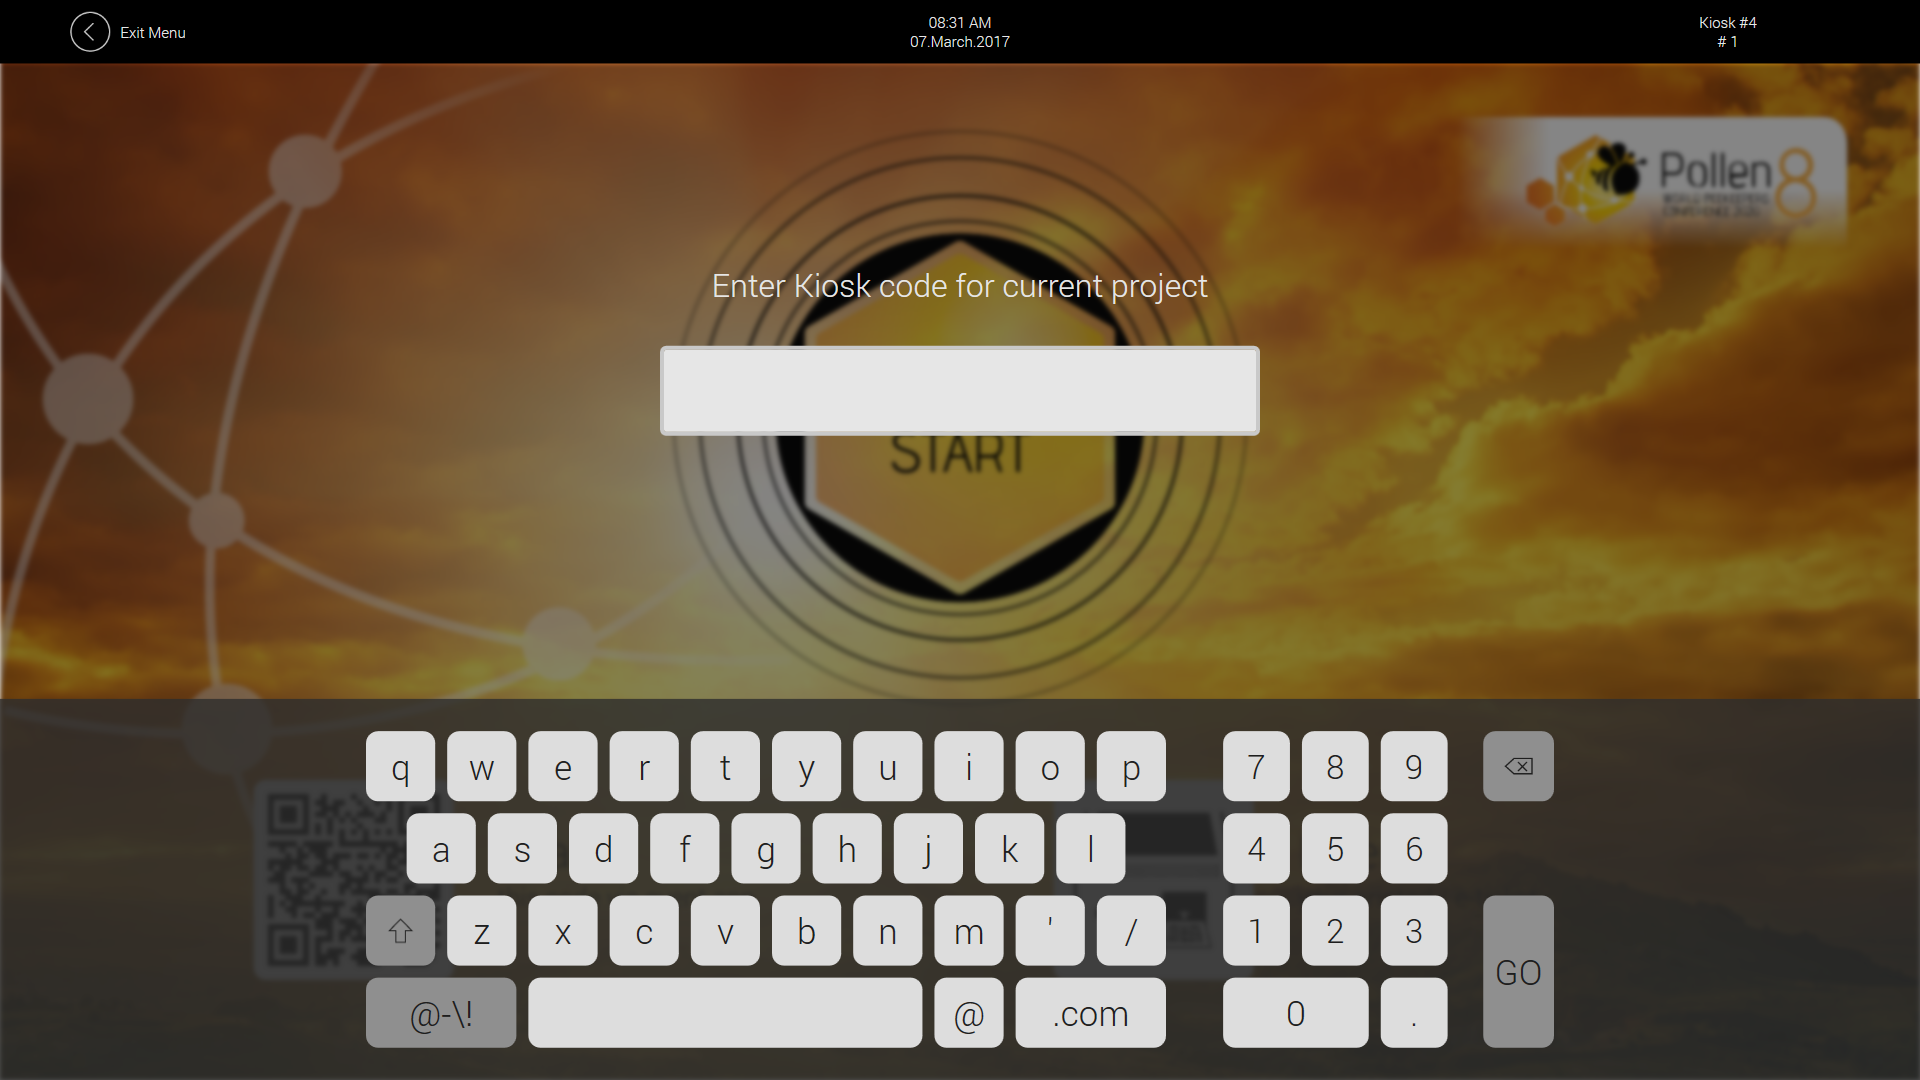
To start a new Project/Event from the Kiosk application you will be prompted to enter the Project/Event Access Code, this is found on the Core dashboard under Project Information.
Next enter the Kiosk Access Code, this is found under Kiosk Manager in the Core.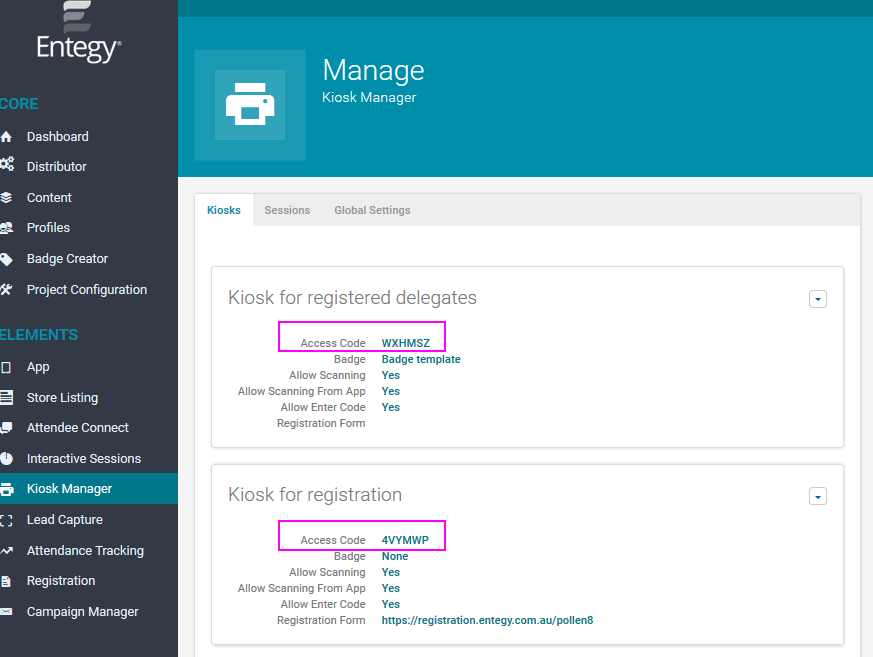
When logging into a Project/Event for the first time you will also need to input a kiosk number. This number is used by the Kiosk Companion App to identify all the kiosks running under the same project, these numbers need to unique but this rule is not enforced.
Kiosk User Display Screens
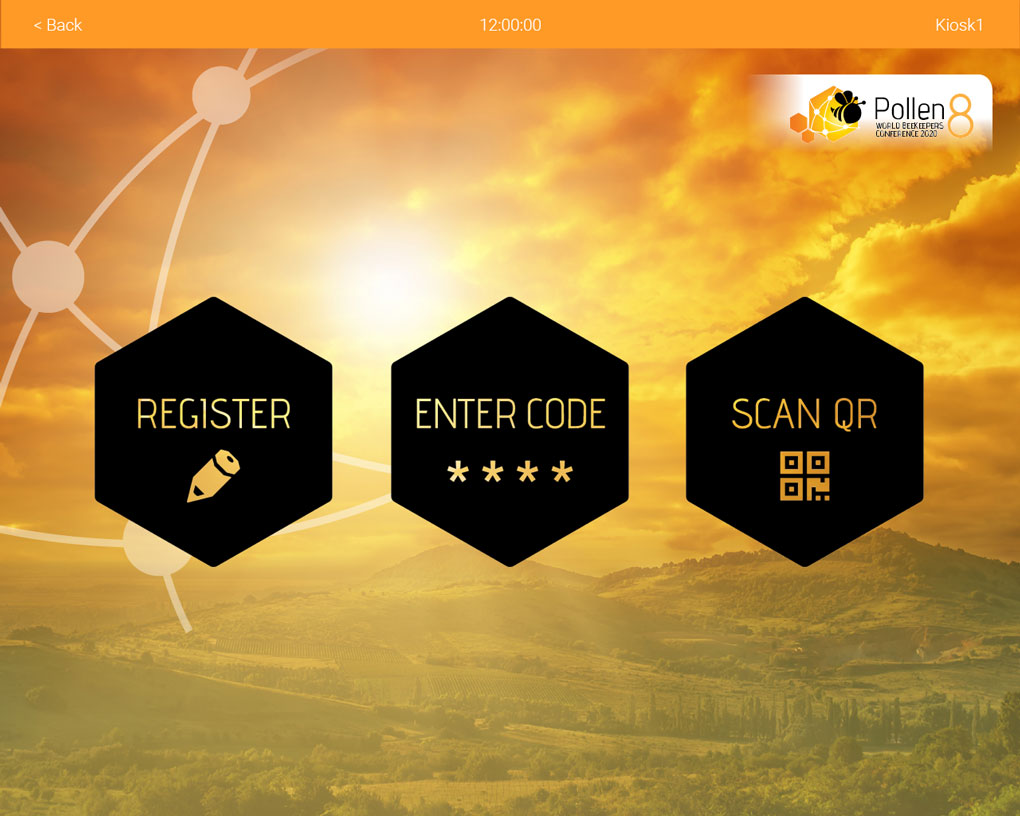
When the project is running the configuration of the option buttons are determined when setting up a Kiosk in the Core.
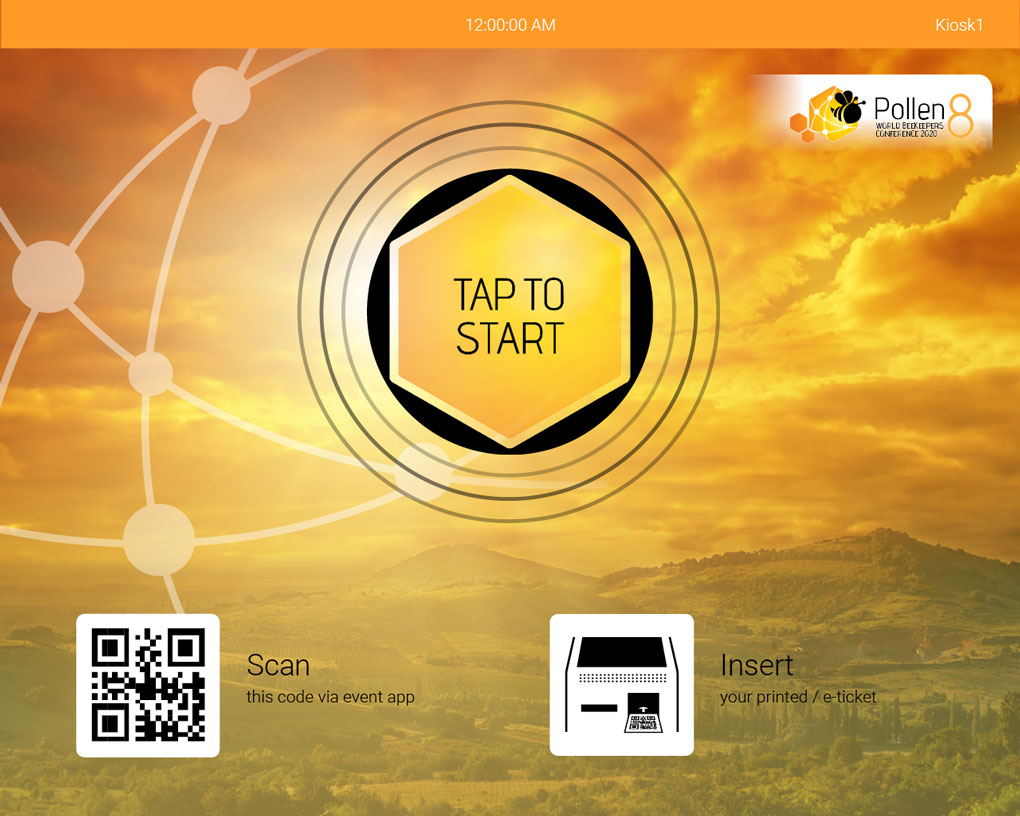
The Idle screen is made up of a circular pulse animation using the 'Tap to Begin' Button Image, If the project has the fields Allow Scanning and/or Allow Scanning from App selected ‘Yes’ then there will be corresponding images on the bottom of the screen. Attendees can scan the QR code from the event app or use the attached barcode scanner to scan the supplied QR code to print a badge from this page. Tapping the idle page will navigate the user to the next screen, this screen configuration is determined when setting up a Kiosk in the Core. There are three options -
- Registration, this page displays a registration form that once filled out adds the new profile to the core and prints the badge.
- Enter Code, this page allows a registered attendee to print a badge from a specific reference code.
- Scan QR, this page is just a placeholder view to indicate scanning is available, although scanning from a QR code code can be done from the Idle page and Main page.
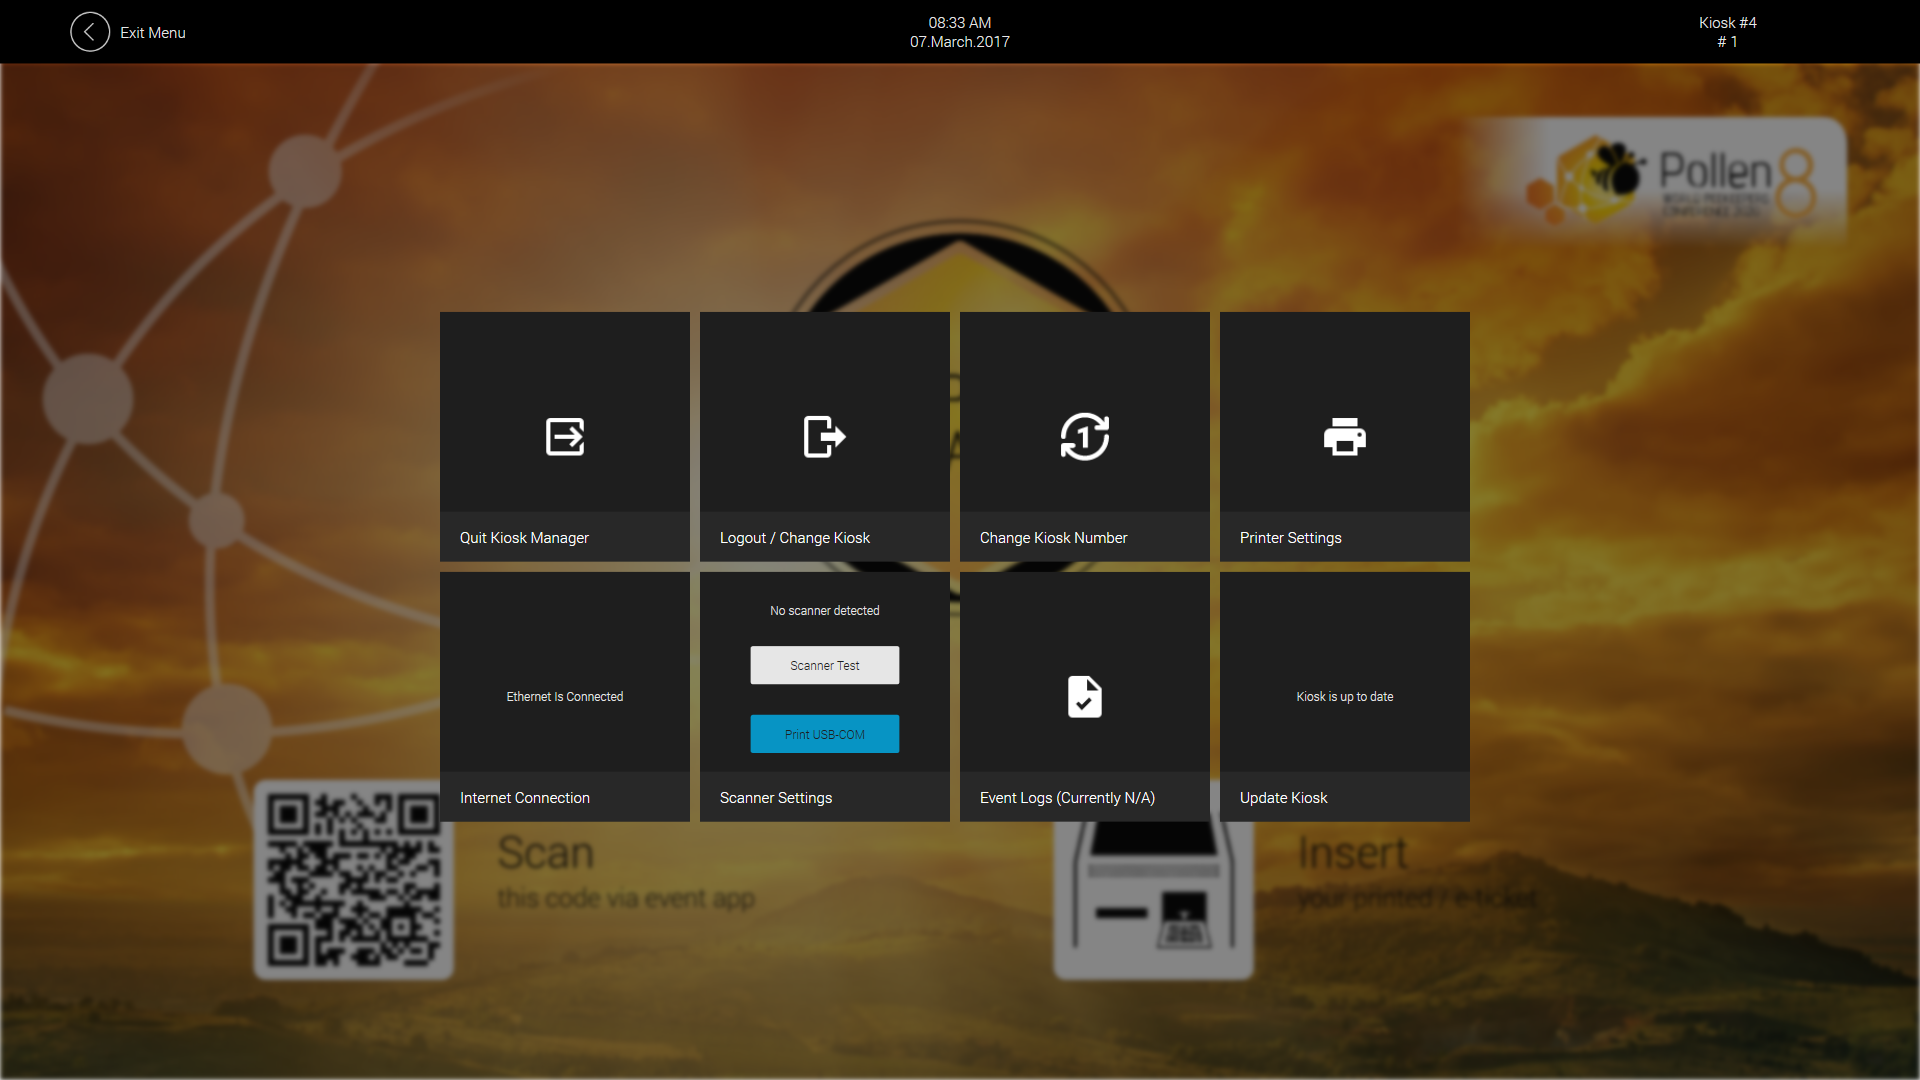
Kiosk Admin Display
To access the admin menu hold down on the top right side of the kiosk screen on the kiosk name and number for five seconds, this operation will only work on the signin page, kiosk number page, idle page and the main page. A textbox appears along with a keyboard, enter the current projects Kiosk Access Code for more options.
Exiting/change a project
To exit the current project you will need to enter the current projects Kiosk Access Code. If you do not have the current projects access code, you will need to restart the device. After restarting the device and opening the application you will be given the option to change the project.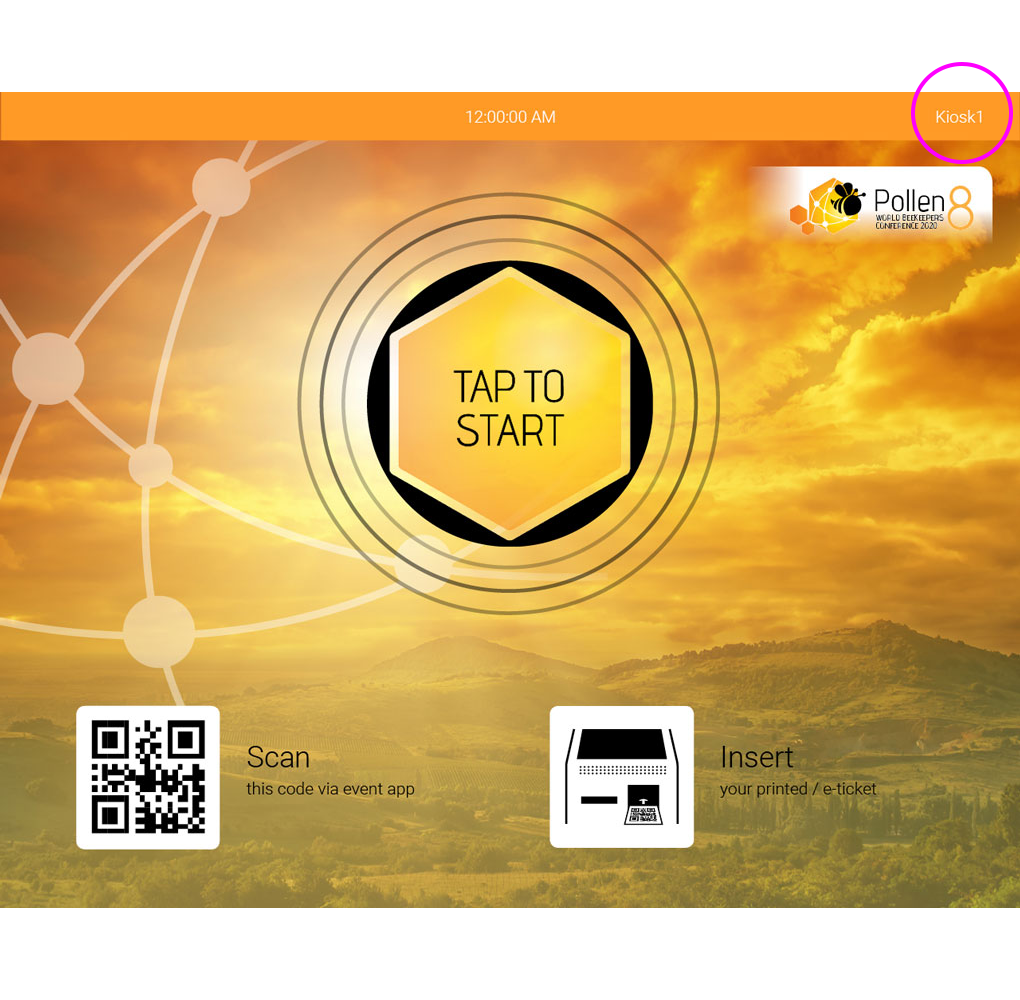
A list of menu tiles will then be displayed
- Quit kiosk manager tile will close the whole application, this is the only option for exiting the kiosk and if you exit while logged into a project you will have option of starting the kiosk up when you re-launch the application.
- Logout/change kiosk tile ends the current project, the admin will be navigated back to the sign in page allowing you to start a new project.
- Change kiosk number tile allows the admin to change the number of that kiosk.
- Printer settings tile allows the admin to set the printer and paper size from within the kiosk, this menu also displays the printer's runtime stats.
- Internet connection tile displays the network connection status, the wifi network will only recognize the previously connected wifi network.
- Scanner settings tile displays the status of the barcode scanner connected to that machine, if the scanner is connected and on but the kiosk does not register its connection, there is a print USB-COM option, this will print a matrix code from the connected printer. Scan this code to change the scanner's input mode from keyboard to COM port.
- Update kiosk tile checks for a new kiosk update, if one is available the admin can choose to carry out this update, once the update is complete the kiosk will continue normal operation. Note Time to carry out the update is dependent on internet connection strength and size of the update and the kiosk will not be operational during this process.