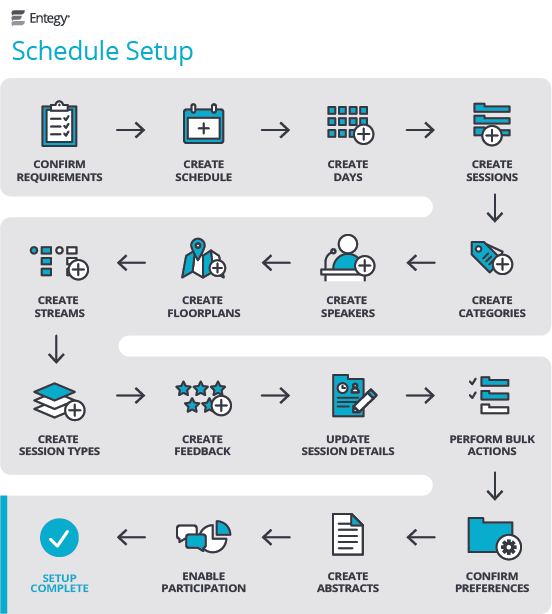
This guide takes you through the process of setting up a schedule for your project in the CMS. It includes all schedule features you may wish to include for your event, however not all features are required.
To confirm the schedule features suitable for your event click here.
If you are using only the Attendance Tracking or Interactive Sessions Elements, you will only need to refer to steps 2-4 below.
- Create speaker content page type
- Upload speakers
- Upload speaker images
5) Create Floor Plans and Rooms *
- Create floor plans content page type
- Create rooms
8) Update Session Details *
These actions below are best completed concurrently when updating a session.
- Link speakers
- Link rooms
- Link feedback form
- Add stream
- Add session copy
- Upload specific session thumbnail
10) Confirm Preferences
11) Enable Audience Participation *
- Activity Feed
- Interactive Sessions
12) Schedule Complete
* Optional features